Paskha mold: version 1.0
- By nygren
- Sat 30 April 2011
Early Spring in our house is a time for cooking and crafts projects as we celebrate both Passover and (Russian) Easter. Both of these holidays are great excuses to cook lots of tasty recipes that we learned from our parents and grandparents, and then to enjoy this food surrounded by friends and family. This year was no exception, and was also the first year in over a decade when we were blessed to have my parents in-town for both holidays.

Back in Russia, one of Ksusha's family traditions was to make Paskha and Kulich, and she has been making them here for Russian Easter for as long as I remember. Both are very tasty! Pascha is made from tvarog (similar to farmers cheese) with various other items such as brandied raisins mixed in. Kulich is a cake similar to panettone (and even tastier from my biased viewpoint, causing me to pretend that Passover has ended a few days earlier than it actually ends). To make the Paskha, Ksusha makes her own curd through a process involving whole milk, a bit of sour cream, a slow cooker, and then draining out the whey through cheese cloth. To make the final Paskha, the curd (and other flavorings) is pressed into a specially-made box lined with cheese-cloth.

Alas, Ksusha's family Paskha molds ("пасочница" or pasochnitsa) are back in Russia. (A google image search shows some examples of some.) As such, I've been meaning to make one for the past few years, so this year was my first try.
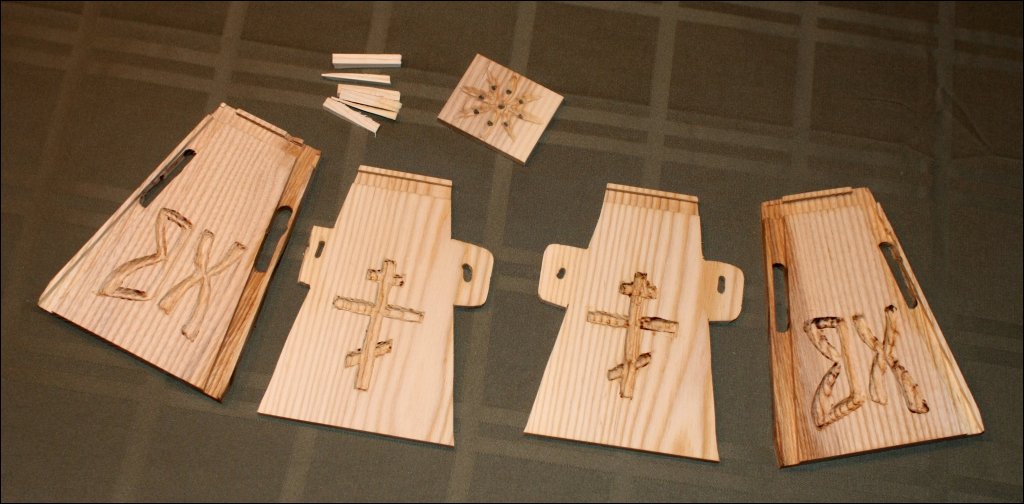
I used a mixture of 1/2" and 1/4" white ash from Rockler (both 5" wide), as that's what they had available. I played with a few different design ideas initially, and then I made templates in qcad and then went down to the shop to make the parts.
In the end, I had two of the sides (with the routed grooves) be 1/2" thick and the other two sides (with the tabs) were 1/4" thick. I then used a dremel tool to carve designs into the wood. One of the traditional designs is an Eastern Orthodox cross, and the other "XB" stands for "Christ has Risen". The resulting side panels:

The various pieces fit together by putting the tabs through the slots and then using the wood pins to hold everything together. (One of the tabs broke when drilling a hole for a pin, but I was able to improvise.) When assembled the box looks like:


After pressing the curd in the mold overnight, we removed it from the mold and while the Paskha was a little soft, it held its shape and the design were clearly visible.

In retrospect, I would have been better off making everything from 1/2" thick pieces as the moisture caused the 1/4" parts to warp (although I was able to flatten them back out by pressing them while wet under a heavy pot overnight). I would also have been better off having the carvings higher on the pieces so that the press didn't push the curd too close to the design. We would also have been better off using a slightly more firm version of the curd, as this one was fairly liquid and required too many layers of cheese cloth (impacting the visibility of the patterns).
Next year we'll have another Easter and I'll make another version.
The final result of this effort was this year's Paskha:

(Many thanks to my parents for taking some of the photos above while we were busy cooking and crafting away...)