
Designing for multi-color 3D printing with OpenSCAD
- By nygren
- Wed 02 January 2019
This post describes a way to make multi-color (multi-material / multi-extruder) objects in OpenSCAD suitable for 3D printing with a Prusa i3 MK3 MMU2. It assumes basic familiarity with OpenSCAD, Slic3r, and using the Prusa MK3. The snowman ornament shown here (thingiverse:3319509) was designed alongside with my five-year-old son and then I used it to experiment with this approach to generate a multi-color ornament.
Background
OpenSCAD allows you design and specify 3D models in a programming language, and allows you to output one part at a time (such as into an STL or AMF file). Slic3r Prusa Edition is a slicer used to do multi-color printing for the Prusa i3 MK3 MMU2. It can import either a multi-part AMF file or can load in a set of STL files, one for each color/extruder.
While OpenSCAD has support for applying colors to elements within an object, it wasn't immediately clear how to leverage this to print a multi-color object. OpenSCAD issue 1608 aims to add some more direct support, but it isn't resolved.
The approach that I've taken here is define and embed a "multicolor()" operator in the OpenSCAD object design which changes its behavior based on a global variable. I then export three separate STL files, one per color, and then import these together into Slic3r.
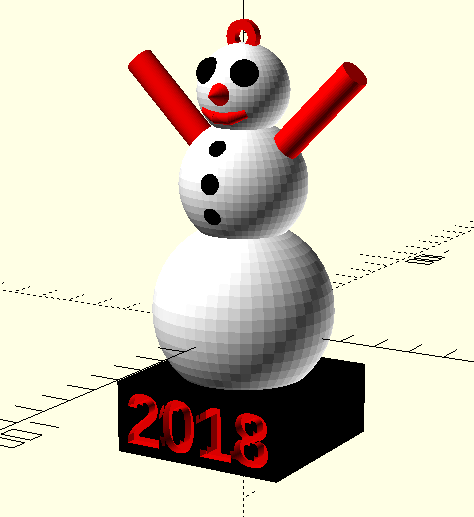
The full OpenSCAD file for the snowman are available here, and I scaled this down by 60% before printing.
For example, here is a rendering of the multi-color object in OpenSCAD:
Designing multi-color in OpenSCAD
I use this function to define a "multicolor" module:
/* Pick a color below for STL export, or "ALL" to show all colors. */
current_color = "ALL";
//current_color = "black";
//current_color = "white";
//current_color = "red";

/* Similar to the color function, but can be used for generating multi-color models for printing.
 * The global current_color variable indicates the color to print.
 */
module multicolor(color) {
    if (current_color != "ALL" && current_color != color) {
        // ignore our children.
        // (I originally used "scale([0,0,0])" which also works but isn't needed.)
    } else {
        color(color)
        children();
    }
}
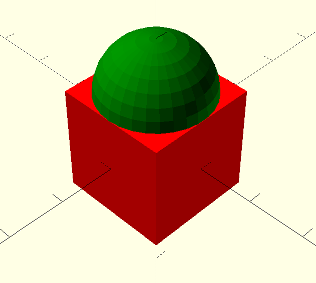
This can then be used to allow different additive solids to be rendered in different colors. As a very basic use-case:
multicolor("red") cube(20, center=true);
multicolor("green") translate([0,0,10]) sphere(10);
Which when rendered with current_color = "ALL"; results in a multi-color object:
In this above case, you could switch to each of current_color = "red"; and current_color = "green"; one at a time, and then for each do a Design->Render (F6) followed by an export (File->Export->Export as STL) as two separate files.
This module works by only applying a color and rendering the children when current_color is "ALL" or when it equals the color passed to multicolor(). Otherwise it ignores the tree of elements underneath.
Note that this only works well when additive primitives (such as union) are used to combine multicolor objects. You can have subtractive primitives (difference/intersection) as children of multicolor(), but with this approach you can't directly use subtractive primitives on multicolor() objects. (The color() function will make things appear like they might work, but the resulting rendered parts won't be proper.) I found that for many use-cases this limitation wasn't a problem.
Note that this approach relies on Slic3r being OK with overlapping parts within an object. It has an ordering such that parts higher in the list take precedence over parts lower in the list for an object.
Once the object is designed, for each color:
- Comment out all other colors
- Do a a
Design->Render (F6) - Export the STL file (
File->Export->Export as STL)
For example, with the snowman example above here is what just red looks like when rendered:
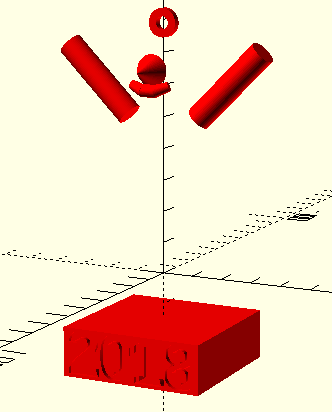
I found it helpful to export the parts with filenames that can be sorted in the order of the desired extruders. For example with the snowman I might export out three separate STLs with:
This is because I wanted black and red to have precedence over white when I load the parts into Slic3r.
Importing into Slic3r
Once you have STL exports, you'll want to import them into Slic3r to get them ready to print. Some initial steps:
- Make sure you have the MMU2 Printer selected (such that multiple Filaments are available).
- Go to the
Printer Settingstab and for each Extruder on the side set the ExtruderPreview Color(eg, to black, red, and white). - Update the
Purging Volumeson the main page. This will open up a table. Especially for a color such as white, you'll need to greatly increase the volume to purge while loading. (Even upping from the default 70 to 150 still results in a pinkish or greyish hue to white on layers that also included red or black.) - Click
Add...and select all of the STL files, and say Yes when it asks to load them as multiple parts of a single object. - Scale and rotate the object as desired. I scaled this snowman ornament down by 60%.
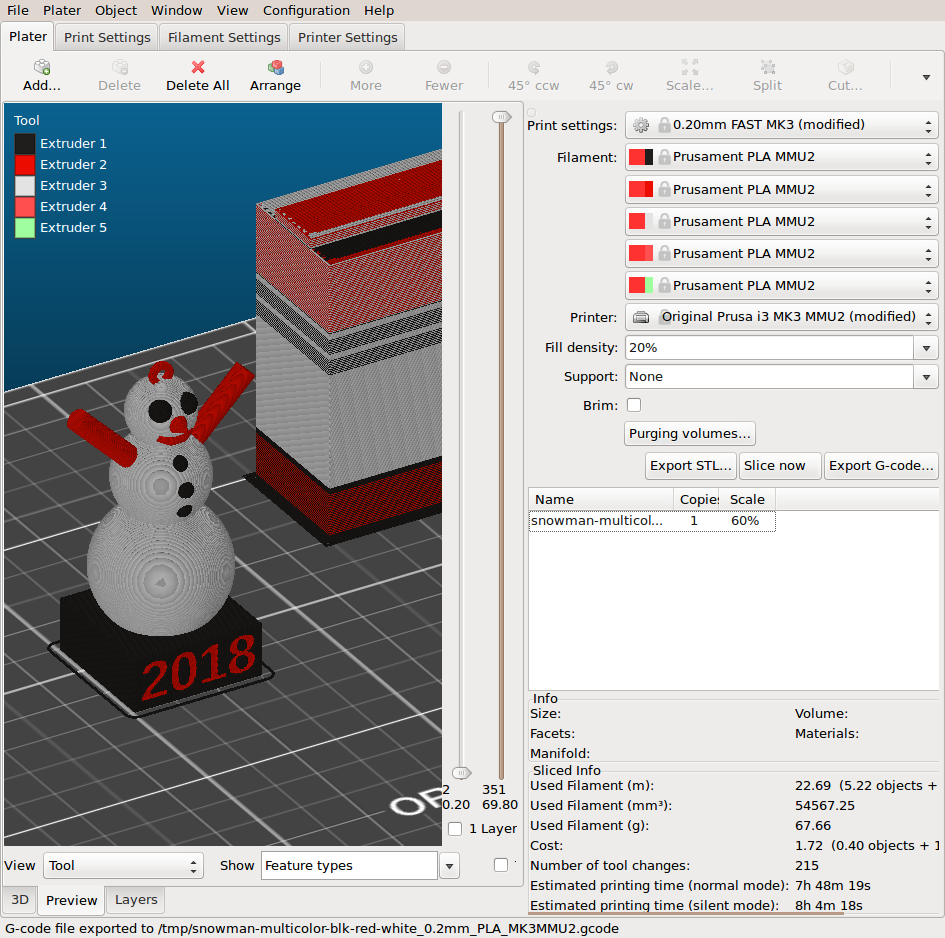
Once the object is loaded and positioned and scaled, double click on the loaded object. This should open a panel like this:

For each part confirm you have the correct extruder selected. Also make sure the parts are listed in the correct order, using the up and down arrow buttons if you need to move the parts. Again, higher parts in the list take precedence when there is overlap.
Next double-check you've selected the right type of filament (eg, PLA or PET) and then slice. When you go and preview, you should be able to see the object in the various colors (and if you scroll through object layers you can confirm what interior parts will be which colors. For example, this is what the full sliced object looks like:
And this is what the an area with multiple colors in a single layer looks like when adjusting to show the cross-section.
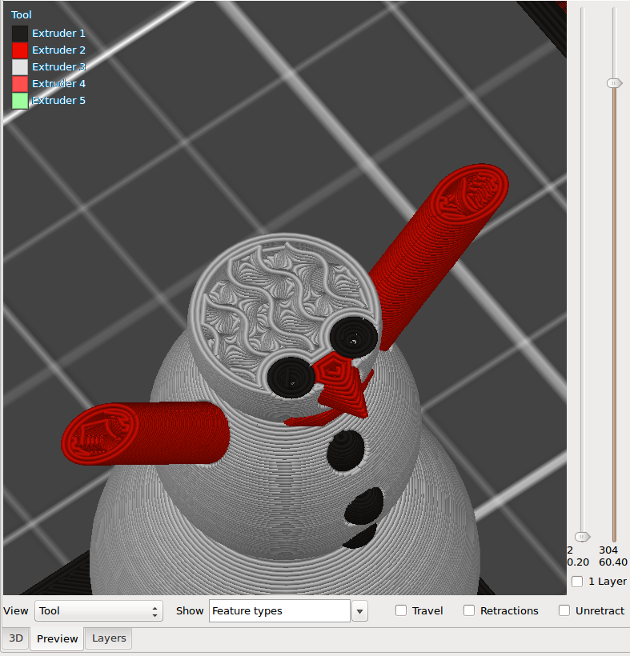
(Side-note: I love using the gyroid infill for many reasons, but it really does look a little like brains in the cross-section of heads --- and I learned the hard way that it thus looks way to creepy when used in translucent colors for figurine toys.)
Printing
Finally, make sure you load the filaments into the correct extruder order for the printer. I've sometimes found it helps to even include the color order in the gcode filename so I don't forget.
Then run your print. I've unfortunately had bad luck getting the MMU2 to successfully complete prints.
The more tool changes (ie, switching between colors on a layer), the more chances of failure. For example, my first attempt to print this ornament had the red fail to load for the top layers in a way that wasn't detected by the filament sensors. I've also found poorly wound filament to also be more likely to jam and result in failures with the MMU2 than without it. I've also had adhesion failures with the purge tower cause failed prints, to make sure its first layer is laid down well and restart the print if it doesn't look like this happened.
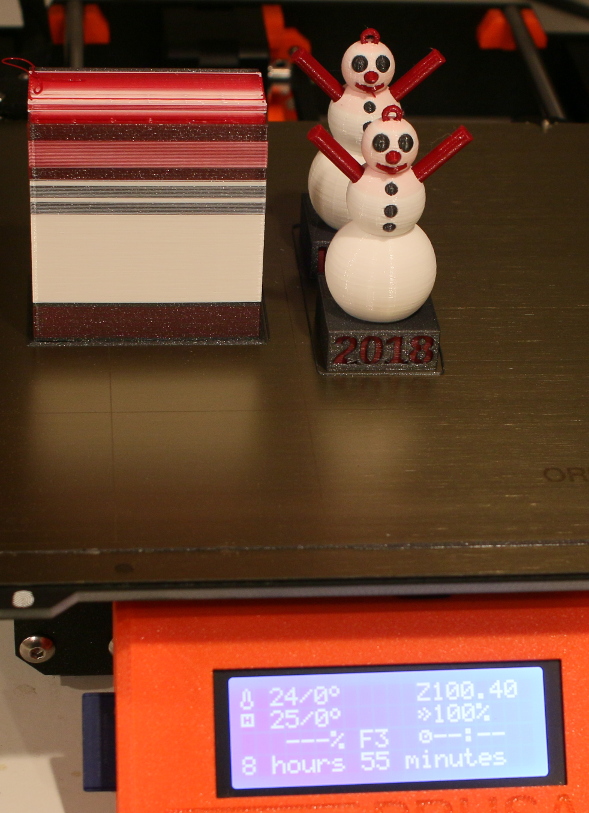
But here is a successful print (60% scale in PLA, Fillamentum Extrafill Vertigo Grey, Fillamentum Pearl Ruby Red, and Hatchbox White):
Other notes
Some other design hints from my experimenting with designing for multi-color printing:
- Tool changes (ie, switching colors within a layer) takes LOTS of time with the MMU2. Because of this, printing a bunch of objects takes not much more time than printing one. If printing an ornament, print a few and give the others away!
- Optimize for layer changes (ie, design to minimize the number of colors within a layer). Think about object internals as well, and review in Preview to look for ways to reduce the number of colors in an object, such as by shrinking how much of an part is inside another part, or by reordering the parts.
- I've anecdotally seen poorer adhesion between different colors/parts within a layer. It looks like Slic3r puts perimeters around each of the parts so with some design approaches you are relying purely on how well the perimeter layers adhere. As such, having parts recessed some into other parts (such as by having the red and black details in the snowman take precedent over the white) can result in stronger structures.
Final Result
Here is the end-result of the snowman ornament hanging in our tree!
Coming next...
Soon to come: a blog post on how to use this technique to design and print a multi-color puzzle.